I have been reading about this Oil Cleansing Method for the last few years on various blogs and online articles. My initial reaction was, "Yeah, like I need MORE oil on my skin". I actually have combination skin, but keeping my makeup from sliding off before the end of the day has always been a challenge. In addition to that challenge, I was still having to deal with occasional acne and blackhead problems and troublesome dry, flaky patches. The very last thing I wanted to put on my face was oil. I often used harsh cleansers on my face in an attempt to keep oily areas under control and used products on my face designed to inhibit oil but it was an ongoing battle and the dry areas of my face were getting pretty bad. My age was definitely showing in my skin. I would try expensive moisturizers on the dry areas but the only ones I really thought were helping were just too expensive for me to make a regular part of my daily routine.
I had been treating myself to occasional trips to a nearby spa for relaxing time in the jacuzzi and sauna area. I would splurge on a massage or pedicure once in a while so I decided I would treat myself to my first real spa facial. It was awesome and the aesthetician was very professional and knowledgeable. She told me something about my skin that truly surprised me. She said that my skin was dehydrated and lacked deep moisture. I asked her how that could be when I struggled so much with oily areas. She explained that the excess oil production was caused because I was regularly stripping away the natural oils in my skin and not replacing that with the proper moisturizer. hmmm. I had long ago learned that over-washing my hair caused it to be more oily. She confirmed that this is based on the same principle. My body was working overtime trying to replace the natural oils that I was scrubbing away. Of course she set me up with some amazing natural cleanser, moisturizer, and face serum. It was some awesome stuff and while I did make the initial purchase, I knew that I would not be paying that price for face products on a regular basis. The next time I ran across someone on the internet talking about the oil cleansing method I figured it sure wouldn't hurt to try. Here is the basic method I used:
BASIC OIL CLEANSING METHOD
Get that hair out of the way with a headband Apply a couple tablespoons of oil to face with fingertips and gently massage until entire face is covered (I chose organic coconut oil but I will list some other popular oils later in this post) Soak an absorbent washcloth with hot water (not too hot!) and wring out excess water while still leaving it pretty wet. Lay the steamy cloth over your face and enjoy the warmth until cloth cools to room temperature (doesn't take long) Gently wipe face with cloth and then repeat the Steam/Wipe until your face feels clean.
The first time I tried this I thought my skin felt kind of oily, but resisted the urge to steam/wipe a 4th time. Literally within a couple of minutes my skin had soaked up any trace of oil from the surface and I had soft, smooth skin that wasn't the least bit greasy. It was only a quick step from the basic method to adding my favorite essential oils and even other natural ingredients (like organic honey) to mix up my own face cleansers at home. I no longer have problems with acne breakouts, I no longer have problems with dry skin or oily skin, (my makeup will still slide off after a day of Mississippi summer heat - but that's just because the heat and humidity melt it off!) I immediately began formulating my own facial cleansers, masks, toners and serums using essential oils and other natural ingredients with great results. I never dreamed that I would ever be cleansing my face with oil twice a day, but I can't imagine doing it any other way now. I'm convinced :)
Some Oil Options for your OCM routine
The above list is only a very short list of options and the descriptions of each are by no means exhaustive. The benefits shown are just a few of the many benefits of each that I have selected to share as they relate to skin care specifically.
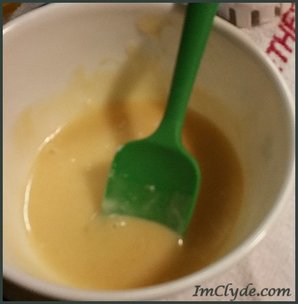
I recommend that whatever carrier oil you choose, that you make sure it is 100% pure, and preferably organic, for greatest benefit. All of the above oils are ones that I have used in my beauty recipes and I love them all. Since I began making my own oil cleansers and beauty products with essential oils I have seen such a dramatic improvement in my skin. I will share here one of the cleanser recipes I've made. I chose this one because it is the one I am using today. Coconut-Honey Anti-Aging Cleanser
INGREDIENTS:
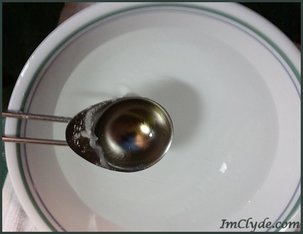
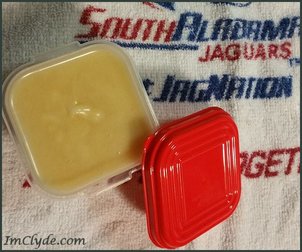
4 Tbs. Organic Coconut Oil 2 Tbs. Organic Honey 1 Tbs. Jojoba Oil 4 drops Frankincense Essential Oil 2 Drops Geranium Essential Oil 2 Drops Copaiba Essential Oil 2 Drops Lavender Essential Oil Small container (I used a little plastic container I got at the dollar store. I recommend a glass container, but I knew this wouldn't last long enough for the essential oil to degrade the plastic!) TOOLS: Small container of really hot water Metal measuring Tablespoon Spatula or whisk for mixing
Links to items mentioned in this post:
Carrington Farms Organic Coconut Oil
Billy Bee Organic Honey Plant Therapy Jojoba Oil Variety Pack of Carrier Oils This is a handy, reasonably priced set that will give you a variety to try. (Fractionated Coconut oil, Avocado oil, Sweet Almond oil & Grape Seed oil) NOTE: Fractionated coconut oil remains in a liquid state regardless of temperature. If you choose to use fractionated coconut oil in this recipe, there will be no need to melt and your final product will be more liquid in nature than solid. It will still work wonderfully, just make sure you put it in a container that will not leak and may be more prone to separating because the honey is so much heavier. The essential oils used in this particular recipe came from Young Living. You can get a customer account at this link: Young Living Essential Oils or contact your Young Living Distributor. I also use oils from Edens Garden. You can find their oils at amazon using the following link:
You can also order directly from their website: www.edensgarden.com
If you decide to give this recipe a try, I'd love to hear how you like it. Regardless of where you purchase your ingredients, please be sure to use high quality for the best results. Feel free to share your thoughts in the comments.
3 Comments
I've been doing quite a bit of research on using essential oils for pets. There is certainly lots of information out there about what is safe to use and what is not. I have chosen to use only oils that have been reported safe to use (from several sources) and to only use them after properly introducing each one slowly once diluted with a carrier oil. Our fur-babies are family in our house and I intend to be just as cautious in treating them as I would be with small children.
I have read information on both cats and dogs, but for the purpose of this post I'll just be using information as it relates to only dogs. It appears that using essential oils on cats requires even more care and caution than with dogs so PLEASE be sure to do your own research and check with a holistic veterinarian about what is appropriate for your own family pet.
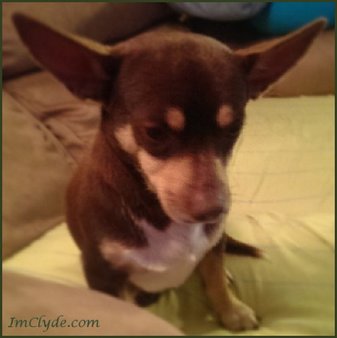
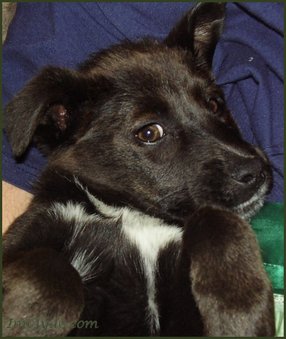
Meet our Fur-Babies! These photos were taken not long after we got each of them. The little guy with the bat ears is my grand-dog Bruce Wayne. He showed up on our porch a couple of years ago looking like he'd been on his own for some time. After not being able to locate his owner, my daughter decide to make him her own. We found out on his first trip to the vet that this poor little guy had heart worms . Treatment was difficult on little Bruce and expensive for my daughter, but they both persevered and he is now healthy and happy. Bobbi (photo on the right) was a birthday present to me from my husband about 7 years ago. She is a smart and loyal companion. One of Bobbi's favorite things is sitting next to the diffuser when it has peppermint / lavender mist filling the room.
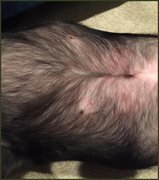
I began my research on essential oil uses for pets initially because of Bobbi's sensitive skin. She has a flea allergy that sometimes results in a trip to the vet for a cortisone shot. I am very pleased to report that the last time she had a bad reaction I was successful in treating it with lavender-water washes followed by applying lavender essential oil (diluted to about 7% solution with sweet almond oil) directly onto the irritated areas . Because she is already so fond of lavender, it was a pleasant process for her. We saw results almost immediately and complete healing within 4-5 days.
Some Precautions
Make sure that you purchase only high quality, therapeutic grade, 100% pure essential oils. There are many companies out there that are selling "scents" or will dilute the essential oils before bottling to cut down on the cost. There are 3 companies so far that I am confident have quality oils (because I have used them). I'm sure there are many others. The comparisons I have been doing on different companies is still ongoing and include more than just oil quality, but so far I am confident that at least these 3 have quality essential oils: Young Living, Edens Garden and Rocky Mountain Oils. I will be including a testimonial in this post from a gal who will share with you where she purchases her oils.
You also need to make sure before using ANY essential oil on your pets that it is safe for them. I ran across lists of various lengths of oils that are NOT safe for use on dogs. In the book "Essential Oils for Dogs – Safe Natural Remedies for Your Dogs Care Guide Book" Author, Dave Lay, has quite an extensive list that included some oils that I have never heard of. The following list of unsafe oils for dogs was included in Amy Joyson's book "Essential Oils for Dogs – The complete guide to Safely using Essential oils" and most all of them were also listed in other sources:
So what oils do I recommend for use on your dog?
As I mentioned before, Lavender essential oil is one of my favorites to use on the dogs because it is gentle and has multiple benefits. It is anti-bacterial, helps to relieve itching, is good for treating irritated skin and allergic reactions, calms an anxious dog, and even helps repel insects.
Cedarwood has antiseptic properties, repels fleas, conditions skin and fights all types of dermatitis. Citronella repels insects, treats insect bites, and calms a barking dog. Eucalyptus is good at repelling fleas and relieving chest congestion. Geranium repels ticks, fights fungal infections and is also good for skin irritations. Peppermint repels insects, relieves motion sickness and improves digestion (and breath!) Vetiver is very calming and is good for cleansing the skin. Ylang Ylang is good for stress and anxiety, prevents wound infection and speeds healing, and helps to maintain healthy skin. Organic Coconut oil is not an essential oil, but is commonly used as a carrier oil and has all kinds of handy and helpful uses. I cook with it, make beauty products with it, and frequently use it as a carrier oil in many of my essential oil recipes. Turns out it is also quite good for your dog. It is good for the immune system and the digestive system. It is great for treating itchy/dry skin and I recommend it as a carrier oil for any of the essential oil applications for your dog. It is safe (and beneficial) for your dog to ingest coconut oil in small quantities daily. It can even be applied to a rag and rubbed on their teeth to freshen breath and whiten their teeth. Because of it's detoxifying properties it is best to introduce it to your dog in very small daily doses at first to see how they tolerate it and to give their bodies time to adjust. After gradually increasing dosage, the recommended daily maintenance dose for a 20 lb. dog would be a teaspoon or less. With close observation you can adjust the dose for your own dog's weight and tolerance. Do not introduce too much coconut oil into your dogs diet too quickly or they could experience tummy upset and digestive issues. Use patience and caution when introducing your pet to a new essential oil. Try diffusing it in the room and watch to see if they show any signs of aversion. You may also apply a couple drops of a diluted oil to your hands or soft rag and allow them to smell it. It is not a good idea to put a bottle of undiluted essential oil near your dog's face for them to smell. Not only could it possibly cause them distress (their sense of smell is highly developed and pure essential oil is highly aromatic), but it would be too easy to accidentally get some of the oil in their nose, eyes, or mouth which could be very irritating or even damaging depending on the oil. If your dog exhibits no signs of distress when exposed to the aroma , then you may take the next step of rubbing some diluted oil on your hands and gently applying it to their fur on their back. Signs of distress may include heavy breathing or lethargy. Before applying essential oil directly to their skin, always dilute the oil with a carrier oil and apply to a very small test area first. Watch the area for 24 hours to be certain there will not be any sort of adverse or allergic reaction to having the oil on their skin. DO NOT APPLY ESSENTIAL OILS TO EYES, NOSE, EAR CANAL, OR GENITAL AREA Here are a couple of recipes you may want to try:
To freshen and help get rid of bad smell you can mix up the following ingredients into a spray bottle (I would suggest glass or aluminum spray bottle).
Flea and Tick Repellent Drops - Combine the following in a 30 ml glass dropper bottle:
To help ease cracked or dry toe pads, you can make a balm from coconut oil (the type that is solid at room temperature) and a few drops of Lavender essential oil and apply it to the pads on the bottom of your dog's feet.
I recently saw some posts on my Facebook feed from a very sweet young lady. She was sharing how much she and her husband were enjoying their experience with essential oils and in particular what a benefit the oils had been for them and their dog. I am very happy that Mary Ann agreed to allow me to share her testimonial here:
GUEST TESTIMONIAL
|
|

|

|
If you have any comments or experiences you would like to share I would love to read them! You may use the comment link at the bottom of this post or share anything you would like at the Share/Contact page
If you would like to subscribe to receive emails about new posts, please visit the
About/Subscribe page
Reference Links:
Amy Joyson – Essential Oils for Dogs – The complete guide to Safely using Essential oils
Dr. Shelton on pets and essential oils - healthypets.mercola.com
Young Living Products specifically for pets
Richard Palmquist DVS article about Pet Aromatherapy for huffingtonpost.com
DO NOT USE ESSENTIAL OILS ON CHILDREN OR PETS UNLESS YOU ARE ABSOLUTELY CERTAIN THEY ARE SAFE!
Essential oils can be very powerful and what is safe for use on adults is not necessarily safe for children or pets. As a matter of fact, it is always a good idea to use a carrier oil even in adult applications and to always test a small area of skin before applying topically or inhaling.
SO WHAT'S BUGGING YOU?
There is a lot more information out there about which oils are effective against pests than what I am going to share here, but maybe this will give you some quick solutions for keeping away some of the most common pests. In the list below I will highlight in Red the oils that I personally would not feel comfortable using on children, and will highlight in Yellow the oils that I would only use on children after serious dilution with carrier oil.
Table of Pests and some Essential Oils that Repel them
- Ants: Peppermint Spearmint
- Aphids: Cedarwood Peppermint Spearmint
- Beetles: Peppermint Thyme
- Caterpillars: Peppermint Spearmint
- Chiggers: Lavender Lemongrass Sage Thyme
- Fleas: Lavender Lemongrass Peppermint Spearmint
- Flies: Basil Cedarwood Patchouli Peppermint Rosemary Spearmint
- Gnats: Patchouli Spearmint
- Lice: Cedarwood Peppermint Spearmint
- Mice: Peppermint
- Mosquitoes: Basil Cedarwood Cinnamon Bark Citronella Eucalyptus Geranium Lavender Lemongrass Peppermint Rosemary Spearmint Tea Tree(Melaleuca)
- Moths: Cedarwood Lavender Peppermint Spearmint
- Slugs: Cedarwood
- Snails: Cedarwood Patchouli
- Spiders: Peppermint Spearmint
- Ticks: Basil Cedarwood Cinnamon Bark Citronella Eucalyptus Lavender Lemongrass Rosemary Sage Thyme
- Weevils: Cedarwood Patchouli
For personal bug repellent, you can put your choice of oils into a 10 ml roller bottle with a carrier oil and roll it directly on your skin or clothing. Another option that would be particularly useful for children would be to apply drops of diluted oils onto a cotton bracelet or cuffs of clothing.
I have a post on how to crochet an Aromatherapy/Bug Repellent Bracelet if you want to make your own. But any bracelet made of an absorbent material will work.
Recipe Possibilities:
Repellent drops (Kid Friendly): In a 10 ml glass dropper bottle add 5 drops Spearmint, Cedarwood, Citronella, Geranium and Lavender. Fill to the shoulder of bottle with fractionated Coconut Oil. Shake Gently. Put a few drops onto cuffs & collars of clothing and/or put several drops onto an absorbent Aromatherapy Bracelet.
Bug Spray (Kid Friendly): In 2 oz glass spray bottle add 10 drops each of Lavender, Citronella and Geranium. Fill to shoulder with a 50/50 mixture of distilled water/witch hazel. Spritz some on before going outside. *Be sure not to spray near face where it could get into eyes or mouth.
I encourage you to try different combinations to see what works best for you. A simple Lavender/Peppermint blend may work just great for you. Citronella oil on it's own may be enough. Just remember that less is more when it comes to essential oils and when experimenting, always start with less and increase concentration if you need to.
Remember this: If you have bug bites driving you (or your child) crazy, reach for the Lavender. Lavender is good for just about everything!
Please share any of your favorite bug repellent recipes that have worked well for you! Be sure to check back for a future post we are working on now about using essential oils on your fur-babies.
Where to find items mentioned in this post:
Glass Spray Bottles
2 oz Cobalt Blue Glass Bottles, with Black Fine Mist Sprayers
Fractionated Coconut Oil
Coconut (Fractionated) Carrier Oil. (2 oz)
Witch Hazel can be purchased in most drug stores. I usually buy mine online here:
T.N. Dickinson's Astringent, 100% Natural, Witch Hazel 16 fl oz (473 ml)
I purchase my essential oils from only a few reputable sources. Here are 2 options.
Young Living Essential Oils can be purchased here:
Edens Garden Essential Oils can be purchased directly from their website (www.edensgarden.com) or you can find them on Amazon:
| Here is an awesome way to wear your favorite essential oils! This project started when a friend mentioned those rubbery bracelets that you can buy and wear as a mosquito repellent. She mentioned how she had bought them for her grandchildren to wear when they were fishing. I started thinking about how much more economical it would be to have bracelets that could be re-used with the added benefit of using essential oils rather than toxic chemicals to ward of those pesky bugs. |  |
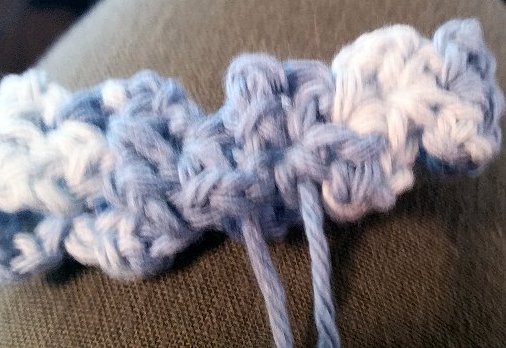
I tried a couple of different ideas for making the bracelets. I settled on a cotton yarn so that it would have good absorbancy and "hold onto" the oils dropped onto them. The first bracelet I made was a closed circle - (I joined the 2 ends). This worked fine - but I started thinking about my friend's grandkids and the fact that they were different ages. Each bracelet would have to be custom-sized for the wrist that would wear it. Could be done -- but wouldn't it be easier to have an adjustable bracelet? A little trial and error resulted in the product shown above. You simply hold the strings while pushing up the bead until the bracelet fits snugly. It's a good idea I hoard craft supplies! I already had a bag of pony beads and plenty of different cotton yarns to work with to develop the following pattern:
Basic Pattern
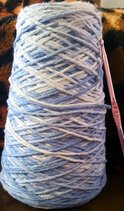
For the bracelet pictured above I used a cotton yard that I had on a spool -- can't tell you the exact weight as it has been sitting in my stash for some time and I think it originally came from a yard sale or something. But it is the type you would use to make washcloths or dishcloths. I found a size "G" aluminum crochet hook in my pencil holder next to my chair so that's what I used for a hook!
Place hook in first stitch (3rd from hook) and make a shell (Shell=1 sc, ch2, 1sc in same stitch)
 |  |
| *When shell is complete, ch 2 and turn. make 1 shell in the ch2space of previous shell* Repeat from * until the bracelet is the length that you want. This bracelet works up very quickly and since it is worked vertically, it is very easy to just make the length you want without having to figure out how many stitches you need in a foundation row. |  |
 | 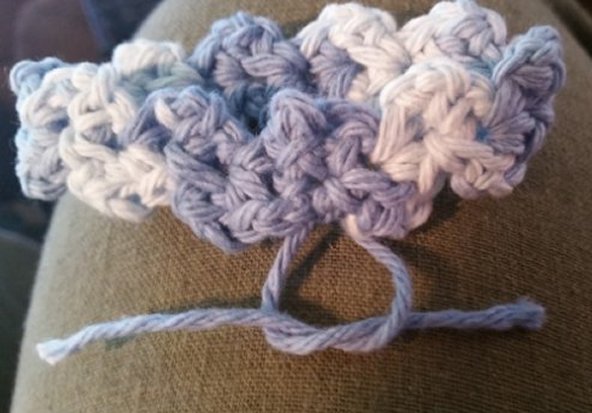 |  |
Make a chain just an inch or two longer than the circumference of the bracelet and fasten off. (keep in mind that when bracelet is tightened it will make the strings longer, so I usually go shorter rather than longer on the chain). The shell stitch leaves a little hole at the center of each shell. I use my hook to weave the chain in and out of these holes all the way around the bracelet. You will want to end on a hole that leaves both ends of the chain hanging on the outside. Pull and adjust until both sides of the chain are of equal length.
 |  |
 | Thread a pony bead onto one string then thread the second string through the bead (from the same direction). Once you slide the bead up onto the part of the string that has the chain (not just the tails) it should fit snugly. If it doesn't, you'll need to use a bead with a smaller hole or start over with a larger yarn! At this point I made a knot at the end of each chain and wove in the tails. That's all there is to it! |  |
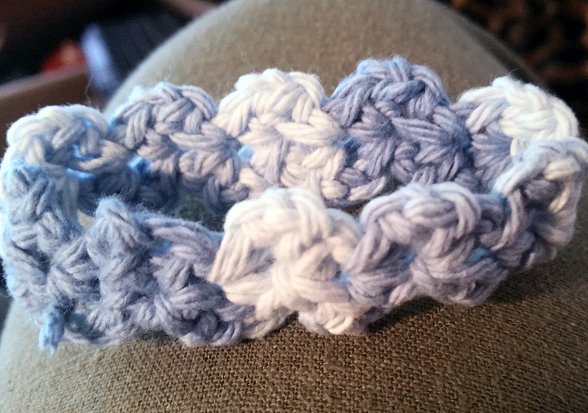
Turns out that the pattern I used above made just a sliver of a bracelet when using Cotton thread and a smaller hook so I modified the pattern a bit. I started with ch 6 and made 2 shells per row (no extra ch between shells - only the ch 2 and the end of each row) It made a nice lacy-looking bracelet. I did not add the chain to adjust size since I made it just to fit me, but I did add a little "button" on the top to hold the essential oil. There's no pattern for the button because I didn't write anything down. I basically just made a small circle (like the first few rows when making a doily) then started decreasing the edge so it curled back in on itself. I kept reducing until I was back to just 1 stitch. I sewed it onto the bracelet with the same black thread it was made from and it turned out pretty good :)
 |  |
It doesn't take long for the lacy bracelet made from cotton thread to stretch out to a point where it doesn't spring back into shape. I promised to send my Auntie a bracelet and a little bottle of my special blend, but she needed one that could be adjusted and tightened as needed. For her bracelet I added the chain that wove through the length of the bracelet. (like in the first pattern) Because the thread was so small, I used one of my jade beads that had a much smaller hole than the pony beads.
I have enjoyed playing with different variations of this bracelet because they are so quick and easy to work up. Hope you will enjoy it too.
|
A continuing series of posts on my favorite essential oils must include Vetiver. Like Frankincense and Australian Sandalwood essential oils, I cannot seem to get enough of Vetiver. I find the earthy/smokey aroma to be calming and I use it in my personal blend that I keep with me at all times. My blend combines the following essential oils in a roller bottle with Sweet Almond Oil:
Vetiver/Australian Sandalwood/Frankincense/Lemon In my comparison of essential oil companies I have intentions to purchase vetiver for at least 2-3 other sources, but as of the date of this post I have only purchased from Young Living. |

|
Origin:
Vetiver is native to India, Indonesia and Sri Lanka but has also been cultivated in other areas such as the Philippines, Japan, West Africa and South America. The roots are mainly steam-distilled in Haiti and Java. Haiti is reputed for producing the highest quality of Vetiver essential oil.
History:
The cooling properties of Vetiver resulted in it's use for bringing natural freshness and cooling during the warmer summer months by weaving mats of the Vetiver roots for use in the home. The roots were also placed into earthen pots to naturally cool drinking water and keep it fresh. The grass was used in making roof thatches and Africans used the grass for making rugs, baskets, and other items for their homes.
Vetiver was used in folk medicine due to the belief that it had properties that produced abundance and is known in India as the "Oil of Tranquility".
What's so good about Vetiver?
 |
Because of it's calming properties, Vetiver essential oil has been shown to be helpful for people who suffer from anxiety and studies have also shown some effectiveness for ADHD when the oil is inhaled. It helps to balance the mind and spirit and strengthen the reproductive system. It is an effective tonic and sedative, proven anti-oxidant, and is even being studied for it's possible uses as a natural insecticide. Other documented properties include: antiseptic, immune-stimulant, circulatory stimulant, anti-spasmodic, and it helps with the production of red corpuscles.
Vetiver oil also helps with many skin problems including acne and aging skin due to it's ability to promote skin regeneration and strengthen connective tissue. |
Common Uses:
Popular ways of using Vetiver essential oil:
- Add a few drops to your favorite carrier oil and use to cleanse your face using the Oil Cleansing Method (OCM). I use organic coconut oil most often for this purpose,
- Add drops to a natural home made after shave or face toner. Make a 50/50 solution of distilled water and witch hazel, Put the mixture in a glass spray bottle and spray onto cleansed face,
- Diffuse by itself or combined with other essential oils. I love the relaxing scent of Vetiver and Australian Sandalwood being diffused together. (no carrier oil needed)
- Use in a warm bath (make sure you add to carrier oil first and THEN put a few drops into your bathwater)
- Add to your favorite massage oil
Precautions:
Internal use of frankincense (and other essential oils) may have toxic effects and should not be ingested without supervision of a health professional.
Always test for skin sensitivity prior to use. Excessive use of any oil can lead to skin sensitization. Keep out of eyes, ears, or nose.
Not all oils are created equal, so be particular about the brand of essential oil you use.
Vetiver 100% Pure Therapeutic Grade Essential Oil by Edens Garden- 30 ml
Carrington Farms Organic Extra Virgin Coconut Oil, 12 Ounce
T.N. Dickinson's Astringent, 100% Natural, Witch Hazel 16 fl oz (473 ml)
2 oz Cobalt Blue Glass Bottles, with Black Fine Mist Sprayers
Sources:

|
I have seen many posts about toilet bombs on other blogs and really wanted to try a recipe of my own that would not only work on keeping my toilet bowl fresh and clean, but could also be used in other areas of the home. I am pleased with the results and want to share my process so you can try them for yourself :)
|
Another recipe I looked at carefully was at Maria’s Self, but I particularly liked the addition of white vinegar and hydrogen peroxide used in the recipe at Popsugar.com. After reading through the ingredients and methods used in these 3 recipes I came up with this recipe to try:
Fizzie Fresh Recipe
|
Materials Needed
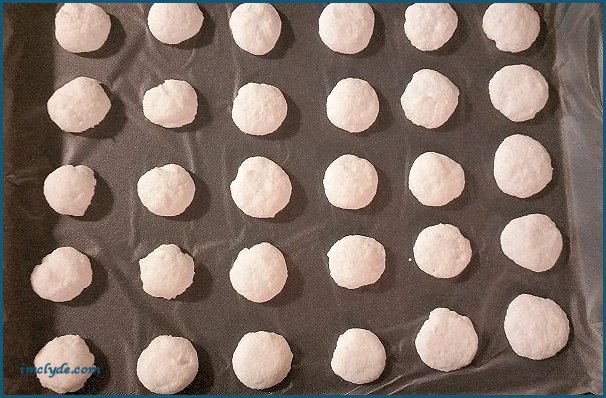
Line your pans or baking sheets with press & seal wrap (sticky side down). I chose to use the press & seal in particular so that the liner wouldn’t slide around when I was putting the discs onto it.
I put the completely dried fizzies into one of my favorite jars for using in the main bathroom. I filled a smaller jar for the purpose of making a pretty picture. Make sure that you use an airtight container for storing to keep them fresh. This recipe produced about 75 little fizzies so I plan to store the extras in a zipper bag and add them to my jar as needed. I'm thinking that I ended up with so many because I did not pack the mixture tightly enough into the spoon before putting on tray to dry. I believe the little bombs would probably last (fizz) longer if I had made them more dense. How To Use: Simply drop one Fizzie Fresh into your toilet bowl after a flush to help kill odor causing bacteria and keep the bowl fresh. You may want to also try these other possible uses for your fizzies:
|
|


Here is where I purchased ingredients for the above recipe
Baking soda, hydrogen peroxide and white vinegar can be purchased in any grocery store. The Citric Acid was a gift from a friend For future recipes I will get it online here: The Peppermint essential oil came from youngliving.com I purchased the Edens Garden lemon essential oil here: |
Thanks again for visiting :)
|
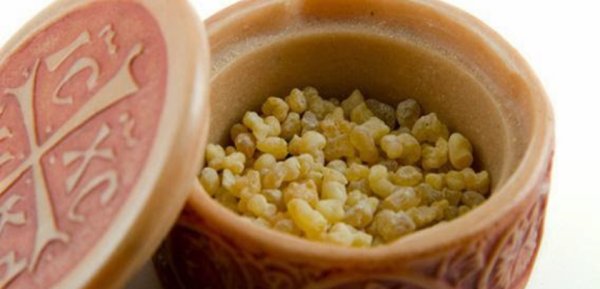
This post will begin a series of posts about some of my favorite essential oils. Frankincense essential oil quickly made its way to the list of my favorites - not only for the many therapeutic benefits but also for the compelling scent.
|
I have probably included more information than necessary in the paragraphs to follow so if you are not a fan of all the back story and just want to know what it’s good for, feel free to skip the parts that don’t interest you. Please read the section on precautions near the bottom, however, before using any essential oil for the first time. That being said, here’s just some of what I’ve learned about one of my favorite essential oils.

Origin:
History:
Frankincense appears in the story of Jesus’ birth. The Bible tells of 3 wise men that followed a star to the manger, and “opening their treasures, they offered him gifts, gold and frankincense and myrrh.” (Matthew 2:11)
Frankincense is mentioned several times in the Old Testament as well as in the Talmud. Jewish rabbis used frankincense in sacred rituals conducted in the Temple of Jerusalem. Later introduced to Europe by Crusaders, frankincense also became an element of many Christian ceremonies.
What's so good about frankincense?
In 2008, a research study was conducted on the impact of frankincense on depression and anxiety. Pharmacologists at the Hebrew University of Jerusalem reported evidence indicates that the aroma of frankincense may help regulate emotions to help relieve anxiety and depression.
The high level of monoterpenes and sesquiterpenes in frankincense is credited with promoting the body's natural healing processes.
In an article I found at verywell.com an alternative medicine expert, Cathy Wong ND, writes,
“… inhaling the aroma of frankincense essential oil (or absorbing frankincense essential oil through the skin) is thought to transmit messages to a brain region involved in controlling emotions. Known as the limbic system, this brain region also influences the nervous system. Aromatherapy proponents suggest that essential oils may affect a number of biological factors, including heart rate, stress levels, blood pressure, breathing and immune function.”
Common Uses:
Frankincense essential oil is typically used in aromatherapy to treat acne, anxiety, asthma, bronchitis, colds, coughs, indigestion, and ulcers. Frankincense is also used to alleviate stress, relieve pain, build and support a healthy immune system, promote cellular health, reduce the appearance of scars and stretch marks, reverse signs of aging, and treat a variety of skin problems.
Popular ways of using frankincense essential oil:
- Apply to the bottoms of your feet to help balance mood swings and help with relaxation.
- Use a drop on each fingernail to help strengthen weak or brittle nails.
- Diffuse throughout your home using a diffuser.
- Make a room spray or linen spray by adding a few drops to a small glass spray bottle and filling the rest of the way with witch hazel and distilled water (75:25 ratio of witch hazel to water).
- Inhale to help clear and focus your mind by applying to a cloth, cotton ball, tissue, etc.
- Apply behind the ears or at the base of the throat as a therapeutic perfume.
- Add a few drops to a warm bath for a soothing and uplifting soak.
My favorite way to use Frankincense essential oil right now is in home-made skin care products. I literally crave the aroma of frankincense and use it in my facial cleansers, micro-dermabrasion masks, skin serums, and facial toners. I have seen great improvement in my skin since I began making and using skin care products using natural ingredients and essential oils. Frankincense essential oil is an ingredient in almost all of the products I use on my face/neck/décolletage. I have seen particular improvement on areas that are darkened from sun damage.
Frankincense is also one of the 3 oils I am currently using in a custom perfume blend. (The other 2 oils in that blend are Australian Sandalwood and Vetiver.) I have had mixed reviews on the earthy-woodsy perfume blend. I was a bit surprised that not many of my friends thought it would be a blend that they would wear, but I find this particular blend to be soothing and comforting. Easing frazzled nerves is something that has been very important to me lately. So what if I noticed a few people looking at me funny when they saw me sniffing my own wrist in the Dentist Office waiting room?
Precautions:
Internal use of frankincense (and other essential oils) may have toxic effects and should not be ingested without supervision of a health professional.
Always test for skin sensitivity prior to use. Excessive use of any oil can lead to skin sensitization. Keep out of eyes, ears, or nose. Not all oils are created equal, so be particular about the brand of essential oil you use.
12 New, High Quality, 2 oz Cobalt Blue Glass Bottles, with Black Fine Mist Sprayers
Australian Sandalwood 100% Pure Therapeutic Grade Essential Oil by Edens Garden- 10 ml
Vetiver 100% Pure Therapeutic Grade Essential Oil by Edens Garden- 10 ml
My husband has suffered from severe night-time leg cramps since 2005. He takes potassium and magnesium supplements nightly, which has helped to some extent, but even with these nightly supplements, his legs would still ache all night long; he was unable to sleep with his legs stretched out fully because the muscle cramps would set in. A full night's sleep is a luxury that he rarely enjoys.
Last Saturday night, while doing some more oil research (on an unrelated topic), I ran across a testimonial that seemed too good to be true. This person shared a simple thing he had done before retiring each night that had eliminated his nightly muscle cramps. I had the oils on hand, but it seemed just a little too easy. I was about to go off on another quest to find more information, but it was getting late, and my hubby was about to head to bed. So, instead of typing "muscle cramps" in my Google search box, I grabbed my oils and followed him into the bedroom.
He was sleeping so well the next morning that I went off to church without waking him. When I got home, he was smiling and couldn't wait to tell me that he'd had the best night's sleep that he'd had in years. He was able to relax his legs and sleep comfortably. Not only was he not awakened with gripping muscle spasms, he said his legs did not ache. He was able to stretch out and sleep in comfort all night and well into the morning!
Regularly interrupted sleep leads to so many problems such as muscle aches, chronic fatigue, decreased cognitive function, lower immune threshold, and so much more. I have extensively researched the effects of sleep deprivation and have first-hand knowledge from my own health issues as to the importance of proper rest.
I'm excited to be able to share with you what appears to be a 30 second solution to a painful problem that has plagued my hard-working husband for more than a decade. Please feel free to comment and share your own thoughts and experiences on this topic.

(This is a testimonial about how these oils worked for us. It is not intended as medical advice. Always consult your physician with any medical questions or issues.)
|
3 drops Cypress Oil*
2 drops Peppermint Oil* Drip oils (no carrier oil used) into the palm of your hand and rub into the area where recurring muscle cramps are a problem. That's it! *I only use therapeutic grade essential oils. These particular oils were from Young Living. I signed up as distributor some time ago because I have confidence in the quality of their oils. Even though I am a Young Living distributor (and would gladly help anyone who wanted sign up) I also use oils from another company that I trust to provide high quality and 100% pure oils. I am slow in my research but am currently exploring information and oils from other essential oil companies for a future blog post on my top picks - because that's just what I do. :) |
This is the procedure we used:
After seeing the dramatic results, I decided to put the blend in a roller bottle that he could take with him when he left back out for work. I chose Grape Seed oil as a carrier oil because it is quickly absorbed into the skin and is reported to have properties that are beneficial to circulation.
I am curious to see if the addition of the carrier oil will dilute the effectiveness of the treatment.
Be watching for an update to this post when he comes back in. You know I'll be asking him for specific information about his usage and results! You can subscribe to this blog on the "About" page.
Update 6/30/16
Even more helpful to me was discovering how quickly this recipe eases vicious tension headaches. I apply it (with roller bottle) to my temples and the back of my neck. Headache relief started almost immediately and the warm sensation on the back of my neck was soothing an calming. This receipe is definitely a keeper!
If you have a favorite roller ball recipe, I would love for you to share it along with information on what you use it for.
I have a tendency to do ridiculous amounts of research on things that catch my interest. I have found an overwhelming volume of information and opinions on the topic of essential oils. My interest in EO's is not just for good-smelly stuff. There seems to be plenty of evidence that EO's can be truly therapeutic physically as well as emotionally. I have always been of the belief that God put everything on this planet that we need for health and wellness, and it seems ridiculous to not look to natural sources to improve our quality of life.
What concerns me is that I'm also finding so much hype and brand bashing that I find myself questioning my own judgement regarding where to purchase my oils. I want quality, therapeutic grade oils with no fillers or dilution of any kind - not even if they are cut with quality carrier oils. I want them at a price that is not inflated beyond a reasonable profit margin. I guess what I want is an honest source that that can be trusted to provide the quality that they advertise at a reasonable price.
I have no problem with a company who uses a MLM (Multi-Level Marketing) structure - as long as the products are top quality and their prices are not unreasonably inflated. I also have no problem buying from a small family business as long as they have the knowledge and ability to provide a high quality product at a reasonable price.
Being new to Essential Oils, I am at a distinct disadvantage in judging quality vs. price. Some of the brands I have looked at are not going to make my short list because of obvious dilution disguised behind carefully worded promises. There were other brands I may have considered if I hadn't seen such rabid attacks against competitors (makes me wonder why they feel they can't rely on quality products and good customer service to keep their brand alive). I see product reviews that are more confusing than helpful and find myself questioning the motives of every reviewer. Are they only giving a negative review because they are a distributor for an MLM brand? Are they only giving positive reviews because they have been offered incentives to do so?
As much as I'd love to just jump in completely with one trusted company for all of my essential oil purchases, I'll have to compare brands, as resources allow, and hope that I don't waste too much $$ trying to decide which company (or companies) can be trusted to produce consistently high quality at a reasonable price. It will be interesting to see how this process works out.
Categories
All
Business
Crochet
DIY Beauty
Essential Oils
Gaming
Health/Wellness
Home Ideas
Making A Difference
Random Thoughts
Archives
December 2018
November 2018
August 2016
July 2016
June 2016

Author
I'm a curious-by-nature 50-something with random interests. Come visit often to see what the latest topic is.
 RSS Feed
 My Favorite Jars!