|
Last month my Facebook page, https://www.facebook.com/ImclydeCE2/ ran a little contest to promote “Small Business Saturday” and encourage people to shop small businesses as much as possible. We asked people to nominate their favorite small business or business owner during the week. The business with the most nominations at the end of the week won a feature blog post here. Our winner was Mooncraft Crochet! Mooncraft Crochet is located in Portland, OR and is owned by Joshua Gross.
Josh is a smart and creative young man and a very talented writer. I asked him to reply to some interview questions. The interview follows with some interruptions by me to add content related to the interview topics. (Josh’s responses are in italics.) When did you open your Business?
In 2018, I saw an ad for the Season of the Witch craft fair at a witch shop in Tigard, OR, a place I had been and met the owner already. This seemed like the perfect foray into the craft show world, and I had a lot to do to prepare. I set up and established an online presence on Facebook under my new brand, and set up my new Etsy page so I'd have somewhere online to send customers. I printed out business cards, got a table and sign, and downloaded the square app for card purchases. Then I crocheted like crazy to set up a good amount of stock. The craft fair was extremely successful, in particular for me and my new business, and I also got several other in person sales and online sales.
I maintain my Etsy site and am always on the lookout for the next craft fair.
What inspired you? My mother initially inspired me to crochet. My whole young life she crocheted and it was always something I wanted to learn. Voodoo dolls in particular were inspired by my time living in the South and by my love of customizing things. I also like strange and unusual gifts and collectibles.
What kinds of products do you offer?
I sell pre-made voodoo dolls as well as custom - made voodoo dolls. I also sell other crochet items when needed or available. I also currently sell jewelry.
Tell us about your internet presence
I also have my own blog, Portland Stair Adventure, where I explore all the staircases in the
Portland Stair Book by Laura O Foster.
What else would you like your customers to know about you?
I am a big advocate of small business, in particular the local independent book stores of Portland and the family and friends who operate businesses online. I am a voracious reader and passionate advocate for reading, encouraging others to read and shop at local bookstores and other small businesses. Following are links and contact info that Josh provided in this interview. I encourage you to take the time to visit these links and enjoy the creativity of this talented young man. You will enjoy his blog(s) I am certain.
*Other small business nominated in this promotion:
Second Place: Barbara Sexton – Avon https://www.facebook.com/BarbaraLaRoseSexton/… https://www.facebook.com/barbara.l.sexton.9 Martha Hull’s Cute + Deadly Art World https://martha-hull.myshopify.com/… Mountain Mary Soaps https://www.facebook.com/Mountainmaryssoaps/ Simply Beautiful Cakes https://www.facebook.com/SimplyBeautifulCakes/ Creations & More Coffee Shop https://www.facebook.com/hurleycoffeeshop/ CW & Associates – Celia Whitmore https://www.facebook.com/celia.whitmore Sean Mizell – Pole Buildings https://www.facebook.com/sean.mizell.7 Simply Kimberly https://www.facebook.com/kimberly.fausak The Chopping Block – Doug Green https://www.facebook.com/TheChoppingBlockHurley/… County Line Bar & Package – Otto Kidle https://www.facebook.com/countylinebarandpackage/… Mobile Yarn – Heidi Sunday https://www.facebook.com/mobileyarn/?hc_location=ufi Hurley Auto Center https://www.facebook.com/pages/Hurley-Auto-Service-Center/158709924163306?hc_location=ufi&rf=137046679771310 Jules Howell – Pure Romance https://www.facebook.com/profile.php… Honest Chocolates Newberg https://www.facebook.com/Honest-Chocolates-Newberg-268335…/… Crazy B’s Coffee & Confections – Susan Kendrick https://www.facebook.com/CrazyBsCoffee/?hc_location=ufi Brandy Porter – LaLa Leggings https://www.facebook.com/brandy.porter.142?hc_location=ufi
Please make an effort to support small business owners in your community!
*Note: Clyde Enterprises / Chameleon Essentials (CE2) sponsored this promotion any businesses mentioned by CE2 during the promotion did not count as a nomination.
0 Comments
So much to explore and so little time *Sigh* I was lucky enough to have someone gift me with a pre-order of the Legion expansion. This gave me the opportunity to create a Demon Hunter a couple of weeks prior to the official launch. The only problem I'm having is that I have so little time right now to indulge in my monster-killing hobby. I did, however, find enough time to create a new character and get as far as starting on my garrison. I hadn't been able to play in months, so it was like coming home. Here are some screenshots of my first day back in Azeroth.
Screen shots from Azeroth 
Sure, i love my Blizzard games and play when I can, but the truth is that I am certainly no expert gamer. I know there are some of you out there who really know the world of gaming and I'm hoping that you will step forward and offer your expert opinions on your favorite games. No detailed gaming review, but I do have a new pattern to share !
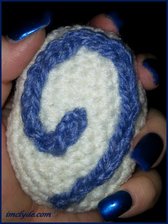
Clyde's Amigurumi Hearthstone Pattern Supplies: Crochet hook size: H/8/5 mm Worsted weight yard - White and Blue Stuffing and Yarn needle Round 1: Ch 2, 5 sc in first ch (do not turn. You will be working in a continuous spiral). Marking the first stitch of each round is advised! I found it helpful to make sure I counted the stitches in each round before going on to the next one just to make sure I was staying on track. Round 2: 2 sc in each stitch around (10 stitches) Round 3: *1 sc, 2 sc in next sc* around (15 stitches) Round 3: *2 sc, 2 sc in next sc* around (20 stitches) Round 5: sc in each sc around (20) Round 6: *3 sc, 2 sc in next sc* around (25 stitches) Another thing I found helpful was to write down which round I completed each time as it can be difficult to count your rounds when working in spiral. Round 7-14: sc in each sc around (25) Method I used for sc decrease = place hook under next sc, yo and pull through that stitch, then place hook under next sc, yo and pull through that stitch, yo once more and pull through all loops on hook. Round 15: *3 sc, sc decrease* around (20 stitches) Round 16: sc in each sc around (20) Round 17: *2 sc, sc decrease* around (15 stitches) Round 18: *1 sc, sc decrease* around (10 stitches) Round 19: sc decrease around (5 stitches) This is where you stuff with Poly-fill or other stuffing (more is better) I used end of the crochet hook to make sure stuffing was pushed evenly into the hearthstone. Round 20 : sc decrease until down to 1 stitch. Fasten off and secure ends. You may want to shape a bit with your hands and squeeze the stuffing into the areas that provide the exact shape you are looking for. To make the swirl design, I used a blue worsted weight yarn and chained 35-40 (depends on your tension and how long you want your swirl to be). After finishing the chain, leave a tail that is at least twice as long as your chain before cutting yarn. Lay out the chain in the design you want. I used straight pins to hold it in place (just don't squeeze the hearthstone too tightly while finishing your design, or you may end up with drops of blood on your hearthstone!) Once the design is laid out as you want it, use the yarn needle with the long tail of yard to secure the design to your hearthstone using up and down stitches in the middle of each stitch on the blue chain. Hide ends. Please feel free to ask any questions you may have about this pattern in the comments. I am thinking I may hang my hearthstone from my rearview mirror (after putting a few drops of my favorite essential oil blend into the stuffing!) If you make your own hearthstone, please share a picture. I'd love to see. You are welcome to share this pattern with others, but please provide a link back to this post if you share it anywhere online. As promised earlier, here are links to some of the other patterns that I found out there that gave me inspiration to try making one of my own. http://www.ravelry.com/patterns/library/hearthstone---world-of-warcraft $4
http://www.sabrinasomers.com/hearthstone-amigurumi.php 4 EUR http://www.ravelry.com/patterns/library/amigurumi-wow-hearthstone Free .pdf download This one is worked in 2 halves and then sewn together, but has the shape I liked http://www.ravelry.com/patterns/library/wow-hearthstone $1
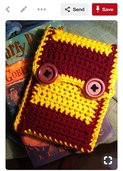
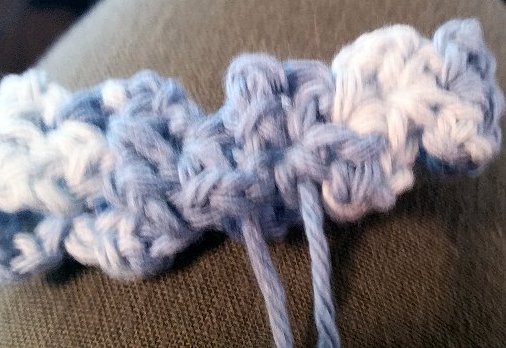
I have made other soap bags of different sizes and design, but particularly like the compact size and how the little bumps massage the skin while I'm getting clean. I was going to get out my boxes of finished items that I have stashed in the back so I could share pictures of the other soap bag designs I have made; but just getting to the boxes was more of a task than I felt like tackling today! Feel free to contact me with any questions if you decide to try the pattern and find yourself with questions. Clyde's Pattern for Soap Saver Massage BagMaterials I used: US – J/10 (6.0 mm) hook I used Cotton “Peaches & Cream” for the multi-color ones. The solid Yellow was a little bit heavier cotton yarn from my stash that has no identifying tags. I used what I’m gonna call a Bubble Stitch (Bubble) to make the bumps on the front. I had used a similar technique on a blanket that is still one of my favorites. Of course I couldn’t find the pattern for that blanket that had the exact name and instructions for the stitch – but after some trial and error I think I got it close enough for my purposes. Instructions for Bubble: *Yo, insert hook into st, pull up a loop* 3 times, working in the same st each time. This should leave you 8 loops on the hook when you are done. Yo and pull through all but 1 of the loops, then yo one more time and pull through the two loops left. NOTE: If you want larger bubbles then just add one or two more yo (4 or 5) before pulling through. Row 1: Ch 8. Starting in the 2nd ch from hook, hdc in each ch to end. Turn. (7 hdc) Row 2: Ch 1, hdc in each st to end of row. Turn. (7 hdc)  From this point on you'll work in rounds (around the edges of the rectangle made from rows 1 and 2.
Round 2: Ch 1. *Sc in next st, dc in next st* 4 times. Sc in next 1 st. **Bubble in next st, sc in next 2 sts** 2 times. Bubble in next st, 1 sc in next st, dc in last st, and join with sl st to first sc. Turn. (18 sts)
 Round 3: Ch 1. Start in the last dc (not the sl st) *Sc in next st, dc in next st* 9 times. join with sl st to first sc. Turn. (18 sts) Round 4 – 9: Repeat Rounds 2 & 3 three times. Round 10: Ch 2, dc in each st. Turn. (18 dc) Round 11: Ch 1, hdc in each st (18 hdc). Tie off and weave in the tail. To make a Drawstring: Chain 50 (keep chain tight). Weave through top of Round 10 tie knots in ends of each side and and trim. You can leave drawstring with 2 ends to make a bow, or tie the 2 ends together to make a loop for hanging in your shower. Because the cotton yarn holds water so well, I always hang mine from one of the shower curtain hooks in the shower so it will dry better. When it dries, the soap will be stuck to the inside of the bag until you soak the bag again the next time you are in the shower/bath. Now you can add your favorite soap and it’s ready to go! Here are links to some other free Soap Saver patterns you may want to try: "Absolutely Easy Soap Saver" by Rachel Chol at Crochetspot.com Soap Saver Pattern at Swirls & Sprinkles Blog Ribbed Soap Saver from crochetncraft.com Crochet Soap Saver (also from Crochetncraft.com) Pampering Massage Soap Saver by Tamera Kelly from Moogly - (this one is quite similar to the one I used) Easy Soap Saver Crochet Pattern by Amy Ranmarine from thestitchinmommy.com (good beginner pattern) If you have a favorite Soap Saver pattern of your own that you would like to share, feel free to post a link in the comment section. I've enjoyed seeing all the different variations on this popular item.
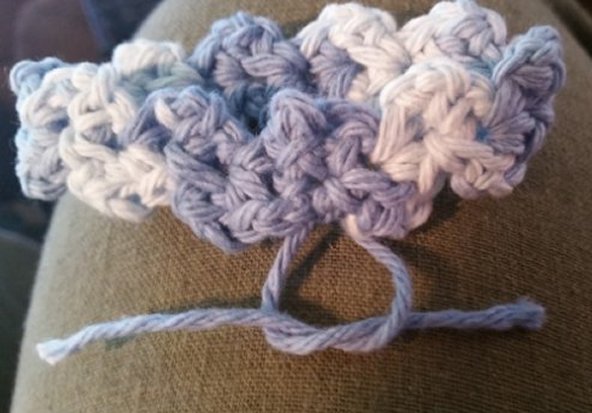
I tried a couple of different ideas for making the bracelets. I settled on a cotton yarn so that it would have good absorbancy and "hold onto" the oils dropped onto them. The first bracelet I made was a closed circle - (I joined the 2 ends). This worked fine - but I started thinking about my friend's grandkids and the fact that they were different ages. Each bracelet would have to be custom-sized for the wrist that would wear it. Could be done -- but wouldn't it be easier to have an adjustable bracelet? A little trial and error resulted in the product shown above. You simply hold the strings while pushing up the bead until the bracelet fits snugly. It's a good idea I hoard craft supplies! I already had a bag of pony beads and plenty of different cotton yarns to work with to develop the following pattern: Basic Pattern 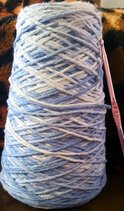 For the bracelet pictured above I used a cotton yard that I had on a spool -- can't tell you the exact weight as it has been sitting in my stash for some time and I think it originally came from a yard sale or something. But it is the type you would use to make washcloths or dishcloths. I found a size "G" aluminum crochet hook in my pencil holder next to my chair so that's what I used for a hook! Chain 3. (leave a bit of a tail - you will use it later) Place hook in first stitch (3rd from hook) and make a shell (Shell=1 sc, ch2, 1sc in same stitch)
When you reach the desired length cut the yard a couple inches out and pull through last loop. This will give you another tail to work with. You can join the 2 sides of the bracelet using a needle, but I simply weave the tail from one side through the stitches on the other, then tie the 2 tails together and weave in the loose ends.
You should now have a perfectly serviceable bracelet. This stitch allows for some stretching to get it over your hand, but in order to make it adjustable there are just a few more steps: Make a chain just an inch or two longer than the circumference of the bracelet and fasten off. (keep in mind that when bracelet is tightened it will make the strings longer, so I usually go shorter rather than longer on the chain). The shell stitch leaves a little hole at the center of each shell. I use my hook to weave the chain in and out of these holes all the way around the bracelet. You will want to end on a hole that leaves both ends of the chain hanging on the outside. Pull and adjust until both sides of the chain are of equal length.
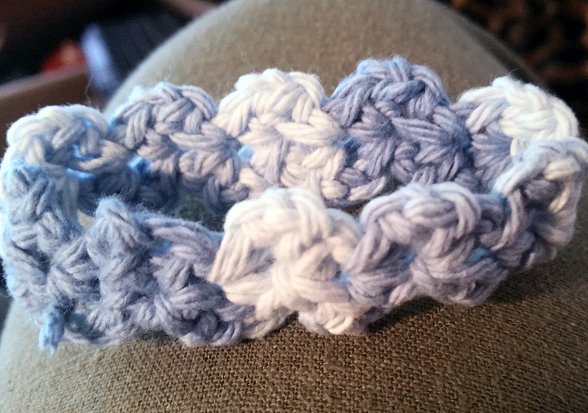
If you are looking for ideas on which essential oils to use as bug repellent, you can check out my post: Repel Pests with Essential Oils. While this cotton yarn made a great bracelet for holding oils and was sturdy enough to hold up to kids, I wanted something a little more feminine that I could wear at work and drop my favorite custom blend onto. (Vetiver, Sandalwood, Frankinscense with just a touch of Lavender and Lemon). I had some black cotton thread that I thought would do. I dug up one of those little bitty aluminum hooks for this project and started to work the same pattern. Turns out that the pattern I used above made just a sliver of a bracelet when using Cotton thread and a smaller hook so I modified the pattern a bit. I started with ch 6 and made 2 shells per row (no extra ch between shells - only the ch 2 and the end of each row) It made a nice lacy-looking bracelet. I did not add the chain to adjust size since I made it just to fit me, but I did add a little "button" on the top to hold the essential oil. There's no pattern for the button because I didn't write anything down. I basically just made a small circle (like the first few rows when making a doily) then started decreasing the edge so it curled back in on itself. I kept reducing until I was back to just 1 stitch. I sewed it onto the bracelet with the same black thread it was made from and it turned out pretty good :)
More info on modification made later:
It doesn't take long for the lacy bracelet made from cotton thread to stretch out to a point where it doesn't spring back into shape. I promised to send my Auntie a bracelet and a little bottle of my special blend, but she needed one that could be adjusted and tightened as needed. For her bracelet I added the chain that wove through the length of the bracelet. (like in the first pattern) Because the thread was so small, I used one of my jade beads that had a much smaller hole than the pony beads. I have enjoyed playing with different variations of this bracelet because they are so quick and easy to work up. Hope you will enjoy it too. |
Categories
All
Archives
December 2018

AuthorI'm a curious-by-nature 50-something with random interests. Come visit often to see what the latest topic is.  |


 RSS Feed
 My Favorite Jars!